Replacing windows is not simply a matter of removing old frames and fitting new glass. To replace windows in house projects successfully, homeowners must evaluate frame damage, wall conditions, energy performance, and installation quality. A window may look modern but still leak air around poorly sealed edges. That mistake can increase heating and cooling costs.
Tom Silva, veteran contractor and longtime host of This Old House, often emphasizes this practical rule: “A window is only as good as its installation.” His advice reflects real job-site experience. Accurate measurements matter. So do sill pans, flashing tape, insulation, and exterior sealant. A small gap behind the trim can allow water to reach the sheathing. That damage may remain hidden for months.
This guide explains how to plan, price, and complete a window replacement in 2026. It will cover window materials, energy ratings, structural checks, installation choices, and common contractor questions. Homeowners should compare U-factor and solar heat gain coefficient ratings before choosing products. Local climate also matters. A highly insulated window may perform differently in a shaded northern home than in a sunny southern room.
Some projects appear easier than expected. They are not always. Old houses can contain uneven openings, brittle siding, or previous repairs that were never documented. Careful inspection prevents expensive surprises. Still, no checklist is perfect. Unexpected moisture or hidden rot can change the plan. That is why qualified installers, written estimates, manufacturer instructions, and local building requirements deserve serious attention.
How to Replace Windows in a House in 2026?
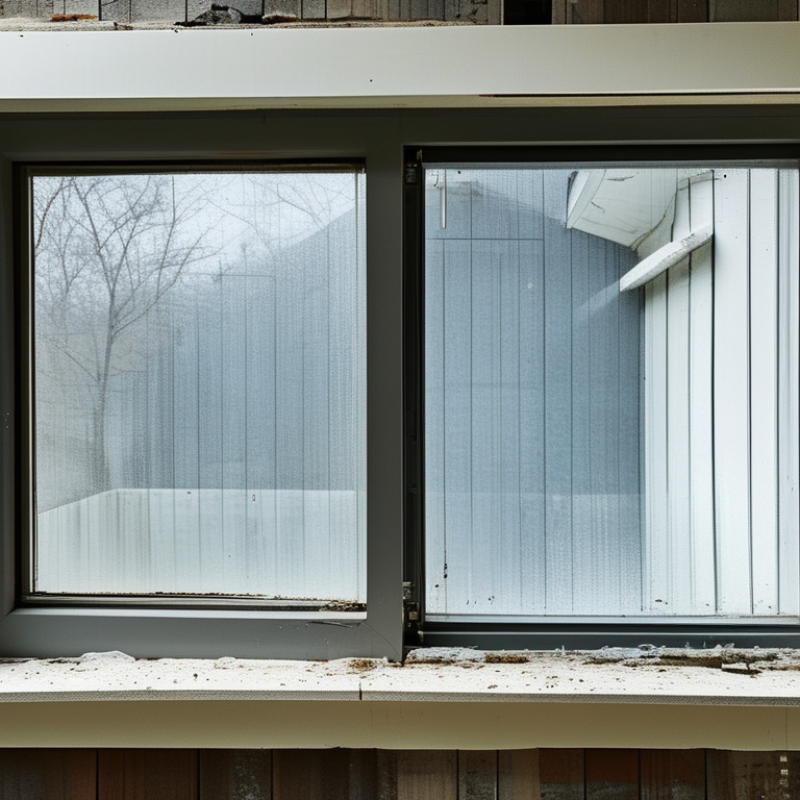
Start with damage, not product selection. Check each frame for soft wood, swelling, cracked glass, failed seals, and water stains beneath the sill. Press a screwdriver gently into wood; softness suggests hidden decay. Look outside for peeling paint, open joints, or missing flashing. The U.S. Department of Energy reports that windows can cause 25–30% of residential heating and cooling energy use. That makes air leakage worth investigating, but not every draft requires full replacement.
Measure each opening at the top, middle, and bottom. Record the smallest width and height, then measure jamb depth and check both diagonals. A 48-inch opening may not be square. It happens. Measure from the existing frame, not the trim, when planning an insert replacement. For a full-frame project, expose the rough opening and inspect the sill before ordering. My practical rule is simple: never trust one measurement.
Build a room-by-room replacement plan. Rank windows by moisture damage, safety concerns, leakage, and daily comfort. Note orientation, shading, and local weather exposure. Compare U-factor and solar heat gain coefficient values using technical information from the National Fenestration Rating Council. The U.S. Department of Energy also advises selecting ratings suited to climate and window orientation. Include flashing, insulation, interior trim, disposal, and repair allowances in the budget. Estimates are imperfect; concealed damage can change the plan. Keep a photo record for every opening.
Assess window damage, measure openings, and set a replacement plan.
A standard replacement-window field check records three width measurements, three height measurements, and two diagonal measurements for each opening. Use the smallest width and height when planning the replacement size, then compare the diagonals to identify an opening that is out of square. Confirm water damage, rot, cracked glass, failed seals, and operating problems before finalizing the replacement plan.
How to Replace Windows in a House in 2026?
Replacing windows in 2026 starts with choosing the right type, not the prettiest frame. I measure each opening, check wall moisture, and note how sunlight moves across the room. A casement window suits windy walls because its sash seals tightly when closed. Sliding windows need less clearance, but their tracks can collect dust and water. For bedrooms, I also check emergency-exit dimensions before ordering. Small details matter.
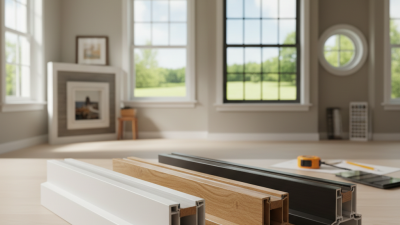
Vinyl frames resist rot and usually need little maintenance. Fiberglass offers strong, stable frames for large openings, though it can cost more. Wood feels warm and works well in older homes, but exposed edges require regular paint or stain. Aluminum is slim and durable, yet it can transfer heat without a thermal break. Do not judge material from a showroom sample alone. Touch the frame. Inspect the corners.
Double glazing is practical for many climates; triple glazing can improve comfort in very cold or noisy locations. Look for low-emissivity coatings, argon-filled spaces, and warm-edge spacers. These features reduce heat transfer, but performance depends on installation quality. A low U-factor helps winter efficiency, while a lower solar heat-gain coefficient can reduce summer overheating. Ask for certified test data, not vague claims. I once focused too much on glass ratings and underestimated air leakage around the frame. That mistake still influences my inspections. Leave room for judgment.
| Window Type | Typical Operation | Recommended Materials | Suitable Glazing | Typical Energy Performance | Advantages | Limitations | Best Use Cases |
|---|---|---|---|---|---|---|---|
| Double-Hung | Both sashes slide vertically; the upper and lower sashes can open for ventilation. | Vinyl Fiberglass Wood-clad | Double-pane low-emissivity glass; triple-pane glass for colder climates or high-performance projects. |
U-factor: 0.25–0.35 SHGC: 0.25–0.40 |
Familiar appearance, easy exterior cleaning on many models, and good ventilation control. | More moving seals can create greater air-leakage potential than fixed or hinged units. | Traditional homes, bedrooms, living rooms, and replacement projects that require vertical proportions. |
| Casement | Hinged at the side and opened outward with a crank or handle. | Fiberglass Vinyl Aluminum-clad wood | Double- or triple-pane low-emissivity insulating glass with warm-edge spacers. |
U-factor: 0.20–0.30 SHGC: 0.25–0.45 |
Compression seals generally provide strong air control; the opening sash can direct breezes indoors. | Requires clearance outside; hardware may need adjustment or replacement over time. | Wind-exposed elevations, modern homes, kitchens, and rooms where ventilation is important. |
| Awning | Hinged at the top and opens outward from the bottom. | Fiberglass Vinyl Wood-clad | Double- or triple-pane low-emissivity glass; laminated glass may improve sound and impact performance. |
U-factor: 0.20–0.30 SHGC: 0.25–0.45 |
Can provide ventilation during light rain and typically offers good compression-seal performance. | Exterior opening clearance is required; larger units may be heavier to operate. | Bathrooms, basements, kitchens, and areas needing ventilation with some weather protection. |
| Sliding / Gliding | One or more panels move horizontally along tracks. | Vinyl Aluminum Fiberglass | Double-pane low-emissivity glass; select thermally improved frames for colder regions. |
U-factor: 0.28–0.40 SHGC: 0.25–0.45 |
Requires no exterior swing space, has a simple operating concept, and works well for wide openings. | Sliding seals and tracks may provide less air resistance than hinged designs; tracks require cleaning. | Low-clearance locations, patios, family rooms, and wide horizontal openings. |
| Picture / Fixed | Does not open; provides daylight and views through a sealed frame. | Fiberglass Vinyl Wood-clad | Double- or triple-pane low-emissivity insulating glass; solar-control coating where overheating is a concern. |
U-factor: 0.15–0.28 SHGC: 0.20–0.50 |
Usually provides the lowest air leakage and strong thermal performance with unobstructed views. | Cannot provide natural ventilation or serve as an emergency escape opening. | Living rooms, stairwells, high windows, and paired designs combined with operable units. |
| Bay / Bow | A projection made from multiple window units that extends beyond the exterior wall. | Vinyl Wood-clad Fiberglass | Low-emissivity double- or triple-pane glass; use matching performance ratings across all sections. |
U-factor: 0.25–0.38 SHGC: 0.25–0.45 |
Adds interior space, daylight, views, and architectural interest. | More expensive and structurally complex; requires careful flashing, support, and roof detailing. | Living rooms, dining areas, and renovation designs where additional projection space is desired. |
| Hopper / Basement | Hinged at the bottom and opens inward from the top. | Vinyl Fiberglass Steel frame | Double-pane low-emissivity glass; tempered or laminated glass where safety or impact resistance is required. |
U-factor: 0.25–0.38 SHGC: 0.25–0.45 |
Compact, weather-resistant when properly installed, and useful for basement ventilation. | Interior clearance is needed; opening size may be limited by basement egress requirements. | Basements, utility rooms, and small openings that need ventilation or emergency egress. |
Replacing a house window begins inside the room, not at the exterior wall. Clear curtains, furniture, and wall decorations from the work area. Cover the floor with a thick drop cloth. Use plastic sheeting to protect nearby furniture from dust and falling debris. Remove blinds and hardware carefully, then label small parts in a container. Wear eye protection, gloves, and a dust mask. A utility knife, pry bar, drill, hammer, level, and tape measure should be close by. I once forgot to protect a wooden floor, and cleanup took longer than the removal.
Open the sash and inspect how the old window is fastened. Cut through painted joints and interior sealant with a sharp knife. Remove screws or nails before applying steady pressure. Do not force the frame if it resists. Hidden fasteners can crack surrounding plaster or trim. Take out the movable sash first, when the design allows it. Then remove the fixed frame in manageable sections. Keep the opening covered if weather changes during the work.
Inspect the rough opening before ordering or fitting a replacement. Check the sill, side studs, and header for rot, moisture stains, or insect damage. Probe suspicious wood with a screwdriver. Soft areas need repair before installation. Measure the width and height at several points, because older openings are rarely perfect. Confirm that the opening is square by comparing diagonal measurements. Record the smallest dimensions. A slightly uneven opening may need shims and adjustment. I have learned that rushing this inspection creates problems that careful installation cannot hide.
Replacing a house window in 2026 requires careful preparation, not just a new frame. Measure the opening at several points, because older walls are rarely perfectly square. Remove the existing window without damaging the surrounding sheathing. Dry-fit the replacement and check that it opens smoothly. A small adjustment now can prevent expensive repairs later.
Set the window on a level sill pan or properly sloped drainage surface. Center it with equal gaps on both sides. Use corrosion-resistant fasteners through the manufacturer’s approved attachment points. Do not overtighten them. The frame should remain straight, and the sash should operate without rubbing. Insulate the perimeter with low-expansion window foam or suitable mineral insulation. Too much foam can bow the frame. I have seen this mistake turn a simple installation into a full adjustment job.
Seal the exterior with compatible flashing tape and a durable weather-resistant sealant. Keep drainage paths open beneath the sill. Inside, create a continuous air seal around the frame, especially at the lower corners. Test the window with a smoke pencil on a windy day, if available. Secure the locks, confirm the emergency opening requirements, and inspect the glass for damage. My measurements are not always perfect, so I recheck the diagonals before final sealing. That extra pause often catches a crooked installation.
Replacing windows is more than removing old frames and fitting new glass. Check each opening before installation begins. Measure width, height, and diagonal points. Uneven openings can cause binding and air leakage. Inspect the sill for rot, moisture, or damaged insulation. A qualified installer should verify local building requirements and safe installation practices.
After fitting the window, test every moving part. Open, close, lock, and tilt each sash several times. Watch for rubbing, gaps, or unusual resistance. Check that water drains away from the frame. Seal exterior joints carefully, but do not block designed drainage paths.
Inside, repair drywall edges and fit trim without hiding moisture problems. Outside, match the existing siding, flashing, and paint as closely as practical. Perfect matching is not always possible.
Tips: Use a level, tape measure, and flashlight during inspection. Keep records of measurements and installation dates. Clean tracks with a soft brush before adding suitable lubricant. Check seals after heavy rain and strong wind. Small gaps become expensive problems. I once ignored a slightly loose latch; winter drafts made the room uncomfortable. That mistake was avoidable. Recheck the hardware after a few weeks, because new materials can shift slightly as the house settles.