10 Tips to Replace Windows in a House Like a Pro?

Replacing old windows can improve comfort, daylight, ventilation, and energy performance. However, the work demands more than removing a frame and fitting new glass. To replace windows in house projects successfully, homeowners must understand measurements, wall conditions, product ratings, and installation details.

A professional approach begins with careful inspection. Look for soft wood, peeling paint, water stains, cracked masonry, and gaps around existing frames. Measure each opening at several points, because older homes rarely remain perfectly square. Record width, height, depth, and the direction each window opens. Small errors matter. A window that seems slightly loose can admit cold air and rain.

This guide presents ten practical tips based on common installation experience and manufacturer guidance. It covers material selection, permits, safety, flashing, insulation, sealing, and final testing. Local building requirements may differ, so checking with the appropriate building department remains essential. Energy labels and reputable warranties also deserve attention, but neither replaces correct installation. A certified installer can identify hidden structural problems that a quick visual check misses. Even experienced renovators make mistakes, especially when rushing measurements or skipping preparation. That is worth remembering. The goal is not merely a cleaner appearance. It is a dry, secure, properly supported window that performs through changing seasons. Expect dust, uneven surfaces, and at least one unexpected repair. Careful planning makes those surprises manageable.
10 Tips to Replace Windows in a House Like a Pro?

Assess the Condition and Measure Each Window Opening

Before ordering replacement windows, inspect every opening from inside and outside. Look for soft wood, cracked masonry, staining, and gaps around the frame. Press a screwdriver gently into suspicious timber. Sound wood resists; damaged wood feels spongy. Check whether the sash opens smoothly and closes without force. A sticking window may indicate settlement, not only hardware trouble. Photograph each opening, including corners and the sill. These images can reveal defects later.

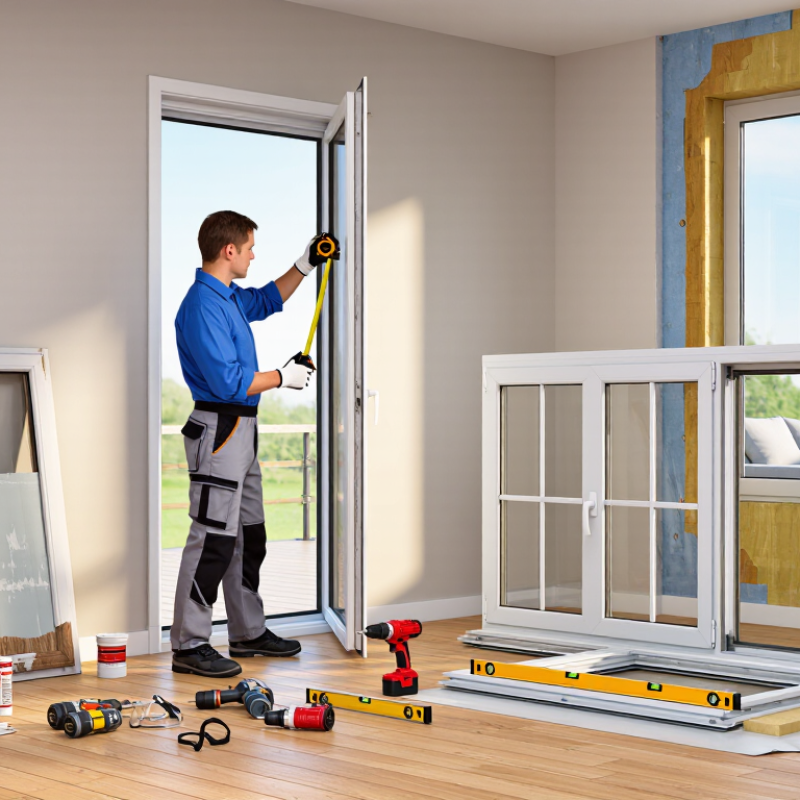
Measure the width at the top, middle, and bottom, then record the smallest figure. Measure the height at the left, center, and right, using the shortest measurement. Measure both diagonals too. Unequal diagonals reveal a distorted opening. Do not measure the old glass. Measure the rough opening or existing frame, depending on the installation method. Write each dimension in millimeters, and label the room and window direction. I once copied a similar window’s measurement and missed a 12-millimeter difference. That mistake could have caused an expensive delay.

Remove interior trim only when necessary to expose the frame and insulation line. Check for hidden shims, corrosion, water damage, or expanding foam. A level and straightedge can reveal problems that a tape measure misses. Take measurements twice. Different days help. If the opening is badly distorted, ask a qualified installer to verify the dimensions. Do not force a standard unit into a crooked opening. It may leak, bind, or stress the glass. Leave space for approved shims and drainage, following the installation instructions.

10 Tips to Replace Windows in a House Like a Pro: Assess Condition and Measure Each Opening

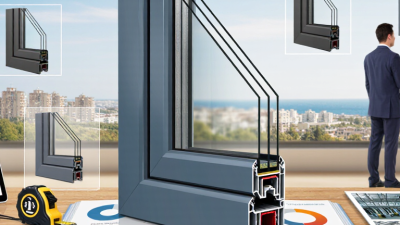
These field measurements show typical window-opening dimensions recorded at three points for width and height. Measure every opening separately, check the frame, sash, sill, and surrounding wall for rot or movement, and use the smallest measurement when confirming the replacement size.

Choose Replacement Windows, Materials, Styles, and Energy Ratings

Replacing windows well starts with choosing the right performance, not the prettiest frame. Measure each opening at three points for width and height. Measure twice. Small gaps matter.

Match the window’s U-factor and solar heat gain coefficient to your climate. A lower U-factor usually improves insulation. A lower SHGC can reduce summer heat, but it may limit useful winter sunlight. Check the whole-unit rating, not only the glass. Look for tested air-leakage data and appropriate water resistance. Energy ratings are guides, not guarantees.

Frame materials also affect comfort and maintenance. Vinyl is practical and usually easy to clean. Fiberglass handles temperature changes with limited movement. Wood offers warmth, but it needs careful sealing and periodic maintenance. Aluminum is strong, though it can transfer heat unless thermally improved. Choose the style around daily use. Casement windows often provide strong ventilation. Double-hung designs are convenient for cleaning. Sliding windows suit wide openings, but their seals deserve close inspection.

Installation can defeat an excellent window. Remove damaged trim, inspect the rough opening, and correct moisture problems before fitting the unit. Keep the frame square, level, and properly supported. Use compatible flashing and insulation without compressing the frame. I have seen small installation shortcuts create drafts that no energy label could prevent. Recheck operation after sealing. The sash should move smoothly, and the lock should engage without force. Local building requirements may affect emergency exits, glass safety, and ventilation, so verify them before ordering.

10 Tips to Replace Windows in a House Like a Pro? - Choose Replacement Windows, Materials, Styles, and Energy Ratings

Use this comparison table to match window materials, operating styles, glazing options, and energy-performance targets with your home's climate and budget.

Tip Window Material Common Styles Recommended Glazing Typical U-Factor Range Typical SHGC Range Maintenance Level Expected Service Life Indicative Installed Cost per Window Best Use
1 Vinyl Double-hung, slider, casement, picture Low-emissivity double-pane; triple-pane in very cold climates 0.25–0.35 0.25–0.40 Low; clean frames and inspect seals 20–40 years $450–$1,200 Budget-conscious projects and standard residential replacements
2 Wood Double-hung, casement, awning, picture Low-emissivity double-pane or triple-pane with insulated spacers 0.25–0.34 0.25–0.45 Moderate to high; exterior surfaces need periodic painting or sealing 30–60 years with proper maintenance $900–$2,200 Historic homes, traditional interiors, and high-end renovations
3 Fiberglass Casement, double-hung, awning, picture Low-emissivity double-pane; triple-pane for enhanced insulation 0.20–0.30 0.25–0.45 Low; occasional cleaning and hardware checks 30–50 years $800–$1,800 Long-term durability, temperature changes, and large openings
4 Aluminum Sliding, awning, casement, picture Thermally broken frames with low-emissivity double-pane glass 0.30–0.50 0.25–0.50 Low; check drainage channels and frame finish 30–50 years $600–$1,500 Modern designs, narrow sightlines, and mild climates
5 Composite Double-hung, casement, awning, picture Low-emissivity double-pane or triple-pane glass 0.22–0.32 0.25–0.45 Low; resistant to common moisture and temperature changes 30–50 years $700–$1,600 Homeowners seeking a balance of appearance, strength, and efficiency
6 Any frame material Casement or awning Double-pane low-emissivity glass with insulated edge spacers 0.25–0.35 0.25–0.40 Low to moderate Depends on frame material Add approximately 10–25% for hardware and configuration Improved ventilation and tighter weather sealing than many sliding styles
7 Any frame material Double-hung or single-hung Low-emissivity double-pane glass 0.28–0.38 0.25–0.45 Low; clean tracks and lubricate hardware as needed 20–40 years $450–$1,500 Traditional façades, easy cleaning, and moderate ventilation needs
8 Any frame material Picture or fixed window Low-emissivity double-pane; triple-pane for cold regions 0.20–0.32 0.25–0.50 Very low; inspect perimeter seals 30–50 years $400–$1,400 Maximum daylight and views where ventilation is not required
9 Any frame material Sliding or gliding Low-emissivity double-pane glass with insulated spacers 0.28–0.40 0.25–0.45 Low; keep tracks free of dirt and debris 20–40 years $500–$1,400 Wide openings where a projecting sash would interfere with walkways
10 Any frame material Any suitable replacement style Choose a certified product with a U-factor of 0.30 or lower where practical Target ≤ 0.30 in cold climates Approximately 0.25–0.40, adjusted for solar exposure Depends on material and hardware 20–60 years, depending on construction and care $450–$2,200 Energy upgrades; confirm local code, climate-zone guidance, and installation quality
How to read the ratings: A lower U-factor generally indicates better insulation. SHGC describes how much solar heat enters through the glass; lower values can help in hot, sunny climates, while moderate or higher values may provide useful passive solar heat in cold climates. Cost ranges are broad planning estimates in U.S. dollars for typical replacement installations and vary by size, access, labor, removal, permits, and local conditions.

Prepare the Work Area, Tools, Safety Gear, and Installation Plan

10 Tips to Replace Windows in a House Like a Pro

Prepare the work area before touching the old frame. Tip 1 Measure width, height, and diagonals twice. Tip 2 Photograph trim, shims, and drainage paths. Tip 3 Cover floors with drop cloths. Tip 4 Remove curtains, furniture, and fragile objects. Tip 5 Keep children and pets outside the work zone. The U.S. Department of Energy reports that windows can cause 25% to 30% of residential heating and cooling energy use. Accurate preparation can reduce costly air leakage.

Gather a tape measure, level, pry bar, utility knife, drill, shims, sealant, and low-expansion foam. Tip 6 Wear cut-resistant gloves, eye protection, and sturdy footwear. Tip 7 Use a supported ladder for elevated openings. Maintain three points of contact. Tip 8 Check the rough opening for rot before ordering replacements. My first replacement mistake was trusting one measurement. The frame looked square, but the sill was uneven. It was not.

Plan installation around weather and curing time. Tip 9 Confirm the window’s U-factor and solar heat gain coefficient through National Fenestration Rating Council ratings. Tip 10 Follow the manufacturer’s sequence for flashing, shimming, fastening, and sealing. The U.S. Department of Energy recommends continuous air sealing around the frame. Do not overfill gaps. Expanding foam can distort the jamb. Test each sash before reinstalling trim. A small gap may remain. Recheck it.

Remove Old Windows and Repair the Surrounding Openings

Replacing windows properly begins with careful removal, not speed. Cut interior and exterior sealants with a sharp knife. Remove trim slowly to avoid damaging plaster or siding. Support the frame before loosening fasteners. Glass can shift suddenly.

The U.S. Department of Energy reports that windows may account for 25–30% of residential heating and cooling energy use. That figure makes opening preparation important. After removing the old unit, inspect the sill, jambs, and header for rot, mold, or water staining. Probe soft wood with an awl. Replace damaged sections with treated, compatible material. Do not cover decay with insulation or sealant.

A rough opening should be clean, dry, and slightly larger than the replacement frame. Check it in three directions. Measure width, height, and diagonal differences. If the diagonals vary, the opening is not square. Small errors become visible at the sash and trim. Use shims beneath load points, not random scraps. Apply flashing at the sill, then seal the side joints carefully. The 2021 International Residential Code emphasizes continuous water-resistive detailing around exterior openings. Follow local requirements and manufacturer-neutral installation guidance.

Do not overfill gaps with expanding foam. It can bow the frame. A low-expansion product is safer, but restraint still matters. Even experienced installers miss hidden moisture sometimes. Take photographs before closing the wall; they make later repairs easier. Leave the opening better than you found it.

Install, Seal, Insulate, and Test the New Windows Properly

Replacing house windows requires more than fitting a frame into an opening. Careful installation prevents drafts, water damage, and uneven operation.

Measure the opening at several points because older walls rarely stay square. Leave the manufacturer’s recommended clearance around the frame. Set the window level, plumb, and centered on solid shims. Check the sash before fastening it. It should open smoothly without rubbing. A rushed screw placement can twist the frame.

Seal the exterior joint with a durable flashing system and compatible sealant. Keep drainage paths clear beneath the sill. Inside, fill the gap with low-expansion window foam, not ordinary expanding foam. Too much pressure can bow the frame. Cover the insulation with an interior air seal, especially around corners. Small gaps near the sill often cause noticeable cold spots.

Test the installation before removing your tools. Spray water gently over the upper corners and side joints, then inspect the interior for moisture. On a windy day, move a thin strip of tissue around the frame to locate air movement. Recheck the locks, drainage holes, and trim alignment. I once trusted a perfectly straight-looking sill and missed a slight slope, which later affected drainage. That mistake is worth remembering. Take photos before covering the joints, and record any adjustment that still needs attention.